Feeds:
Posts
Comments

I had an oh-so-consistent pattern in university. The semester would start, and fairly quickly, paper topics would start being assigned. I would get uber-excited about my paper topics – BC land claims settlements in the Agricultural Land Reserve, political undertones in Shostakovich’s 5th Symphony, the legal issues surrounding pipeline development in Alberta, the role of the Gamelan in Balinese culture (yup, I had a pretty all-over-the-map university experience) – and read and think and read and think. But then I wouldn’t start writing my papers until 48 hours before they were due.

Every time I would lament the lost potential. If only I had started earlier, this could be the best paper ever. But no. I’d left it too late.

The familiar feeling started creeping into my mind at about 3am on Wednesday July 6th. The opening of 52 Projects: The Exhibit was less than 48 hours away, and I still didn’t have a single board completed. My room was covered in paper scraps. There were photos absolutely everywhere. My fingers were blistered and sore from constant glue-gun use. And I was pretty sure that Friday night would come, and people would show up to an empty gallery.

Somehow, though, that didn’t happen. With some amazing help from some extraordinary friends, Friday came, and the exhibit was up. There was even home-made food to eat! And, best of all, it was really fun!

52 Projects: The Exhibit is up at the Wise Daughters Craft Market until mid-September. Check out the hours and location and stop by to take a look!

And for anyone interested in seeing just how the exhibit was put together, from start to finish, check out the photo montage here! (hit the “slideshow” button on the top right in the new tab for the full effect!)

A million thanks to some extra special for all their help in getting the exhibit up. Specifically Chris, Karim, Mary, Danette, Ian, the Rusholme Gals and to everyone else for the love, support and encouragement!

Photo Credit: Karim Rizkallah

summer lovin’

Ahh the bliss of summer.

I write this while sitting on my front porch. There’s a robin pecking away in my vegetable garden, a breeze at my back, and in a few minutes I’ll be biking off on my trusty ride Jolene to go swing dancing. Sometimes I wonder if life could possibly be any more amazing…

Friends!

I spent last weekend doing my 5 favourite things – dancing, eating, laughing, crafting and frolicking – with some of my favourite people on earth. We celebrated the marriage of our friends J&K, we made hands down the best home-made pizza ever (word to the wise – cilantro pesto on thin crust pizza? i-n-c-r-e-d-i-b-l-e!), and we took in some incredible community events (like The Stop‘s annual Deli Duel & Clay and Paper Theatre’s Day of Delight).

After 48 hours of fun, bliss and sunshine, I convinced Brendon & Dave to help me finish off my latest project – a mosaic for the front of my dear house.

Here’s how it went…

Materials

  • Glass, tiles
  • Safety Gear (mask, eye protection, rubber gloves)
  • Hammer
  • A backing for your mosaic (e.g. a nice piece of wood, a glass vase, etc.)
  • Tile adhesive
  • Popsicle sticks (or chop sticks)
  • Cement
  • A damp rag
How To Do It
  1. First, you need to collect your “pieces” that will make your mosaic. You can always buy pre-cut pieces from craft stores like Michaels, but for me, this is pricey and way less fun. Instead, I grabbed a few old, chipped plates and picked a few extras up from Value Village.
  2. You need to be super careful when you break your plates up. It can seem like a great idea to just chuck them against a wall, but you run the risk of getting little pieces if your eyes and creating a pretty hazardous situation. In order to make sure I still had full eye-sight (etc) after, I wore eye protection, a dust mask, rubber gloves and long sleeves (believe me, those tiny little tile dust particles can get everywhere and really hurt). It looks a little silly, but is well worth it. Just embrace it, throw this on your stereo, and do a little dance!

    Safety First!

  3. Wrap your plates up in a heavy cloth or plastic bag, re-adjust your safety gear, and start smashing. It feels goooood.
  4. Next lay your pieces out on your backing (in my case, an old piece of wood from my sister’s roommate) and create your design. Don’t feel confined by tile pieces. You can just about anything – buttons, bells, stones, shells, beads – even Scrabble pieces! (Note – I started feeling weird about explicitly putting my address online through these photos, so I blacked out the street name, but trust me – the Scrabble pieces look GREAT!)
  5. Once you have your design laid out, it’s time to stick the pieces on! I spoke to some folks who mentioned that white glue works for this, but I decided to use full-on tile adhesive because I wanted my piece to be able to weather the outdoors. Using the popsicle or chop sticks, brush tile adhesive onto the back of each piece and press firmly in place.
  6. Let stand overnight to make sure the glue / adhesive dries fully.

    This time, with tile adhesive!

  7. Mix a little bit of your cement up at a time (it dries quickly!) adding just enough water to give it a creamy consistency.

    It's so creamy I almost want to eat it!

  8. With gloved hands, begin pressing the cement in between the tile pieces, pressing firmly so that it fills all the gaps between the pieces. Don’t worry if you get some on the tiles themselves – it’ll wash off.
  9. When you’re finished, use a damp cloth to wipe the excess cement off your tiles. You make want to do this a few times after the cement is dry for best results.

    Finished! (well...almost! It's still wet here, but when it dried the cement was much lighter)

Et voila! A wonderful porch-side, summer-evening project!
A wee postlude note … I realized tonight that it’s the 1 year anniversary of the start of this project. Which is also the end of my allotted 52 weeks! While I haven’t quite hit 52 projects (I’m at #44, with a few that still need to be written up and posted) I’m feeling pretty good about the year. The next post will have lots of reflections about the year that has passed, and an update of what’s coming next. Stay tuned!

Oven Mitts 101

When I was eight years old, I visited my oldest brother in Toronto.

It was a pretty big deal. I took the train all the way from Ottawa, we went to a Jays game and Kensington Market, sang Irish drinking songs while strolling down Bloor Street, and I bought a pair of green Umbro soccer shorts with my own money (trust me, it was a really big deal). I felt so grown up. So mature. So cool.

In the mix of amazing memories I have from that trip, one of the most vivid was meeting Evan’s roommate Alex. To me, Alex was (and still is) the epitome of cool. She played the guitar in a band. She talked to me like I was an adult. And she could sew a pair of jeans into the coolest looking “bum bag” I’d ever seen.

Alex has since become like a surrogate member of our family, becoming close friends with us all, and until recently lived just around the corner from my house. A few months ago, though, Alex moved to the East Coast. Before she left, she invited me over to raid her supply of fabric. It felt a little like Christmas morning – amazing colours and patterns, textures and sizes. I left with garbage bags full, which I’ve been slowly putting to good use with various projects.

One of the gems that I came home with that night was a roll of heat-resistant batting, perfect for a pair of oven mitts. So tonight, with Alex’s latest CD playing the background, I set out to make some.

Here’s how it went…

Materials

  • Cotton Fabric for the Outside
  • Fabric for the Lining
  • Heat-resistant batting
  • A Sewing Machine
  • Pencil & Scissors
  • Bias Tape or Lace
How To Do It
  1. For starters, you need a pattern. I used a great one that I found online here. Alternatively, you can trace around your hand, giving an extra inch or so for sewing and ample room to fit all hand sizes. Or, try using a pair of existing oven mitts as a guide (again, leaving extra space for the seams). 
  2. Trace and cut out: 4 cotton “outsides” (fancy patterned fabric for the outside of the mitts – 2 for the right hand, 2 for the left), 4 cotton linings (again, 2 for the right, and 2 for the left), and 4 batting middles (ditto). Depending on the thickness of the batting, and how heat-resistant you want these bad boys to be, you might want to double up and cut out eight of the batting.
  3. Each side of the mitts (you’ll make two tops and two bottoms) will be comprised of 3 layers – the lining, the batting (1-2 layers) and the top. Once you’ve got your pieces cut, lay each mitt-side in this order (right sides facing out) and pin the layers together all the way ’round.
  4. Next you want to do a quilting-like top stitch. This acts to hold all the layers tightly together. Depending on your fabric, you could choose a bold colour of thread and make a pattern, or you can do something more subtle. I decided to just meander around the material.
  5. Change to a zig-zag stitch and stitch around the edge of the whole mitt, cementing the three layers firmly in place. Don’t worry if your layers don’t perfectly match up – the seams will be hidden by the end.
  6. Repeat this whole process now for the “bottom” of your mitt (ie make a mirror-image version of the one you just made).
  7. When you’ve got both the top and bottom of your first mitt done, lay them on top of each other, right sides facing each other and pin around the edges.
  8. Using a 1/2″ seam, sew the two sides together almost all the way `round. Trim the extra away from the edges and turn right-side-out.
  9. Next, you want to create a nice edge along the bottom. This is where the bias tape, lace or other edge come into play. My suggestion is to use the bias tape, as you can make a little loop with it to hang your oven mitts up with. For instructions on sewing with bias tape, check out this little instructional video.
  10. Repeat the whole thing to make your second mitt and voila! You’re done!

Hi friends!

Ah, it feels like it has been so long.

After a glorious two weeks on the west coast (think 1500 year old redwoods, white caps pounding against the cliffsides, and a few inspirational days in both Portland and San Fran), I’m back in my cozy little abode, doing my best to stay dry.

The next project post will be coming soon, but in the meantime I wanted to let you all in on a little exciting 52 Projects spin-off that’s brewing.

I’ve mentioned Wise Daughters Craft Market before. The incredible owner, Mary, gave me the table loom, lent me the basketry book, and has overall been a source of support and inspiration all year long.

Well, a few weeks ago Mary and I sat down to talk about turning 52 Projects into an exhibit, that will run this summer in the gallery/studio space based at her store.

To say I’m flattered and totally psyched is an understatement. But before I get too far into the planning, I was hoping to get your help.

We’ve decided to display just 12 projects, and I’m having a ridiculous time choosing which to profile. I’ve created different categories, tried to think about getting a balance of quirky projects and practical ones, projects that you could take a class for and ones you can do yourself, ones that take a while and ones that are easy-peasy-lemon-squeezy.

But, I still am undecided.

So! I’d love your feedback. Which projects (completed and yet to be done — check out the list here) would you profile if you were turning this blog into an exhibit?

Thanks friends!

I’m on vacation.

Yup, that’s right. For the next two glorious weeks, I am practicing dolce far niente on the west coast, including a few lovely days in Vancouver with my parents, and a little roadtrip down the Oregon & California coasts with my amigo B.

Before leaving, it occured to me that I didn’t factor vacations in to 52 Projects. Given that I’m already behind (with 12 projects to finish in the next 7 weeks if I’m to keep strictly to timelines – an unlikely prospect), I began brainstorming what I could take on the road.

As I scanned the list of remaining project ideas, one immediately popped out – make a recipe by your great-grandmother! What better project to take on under the supervision of my own mom – cook and DIY-er extraordinaire!

An incredible piece of family history.

My mom, naturally, was totally on board with the idea. Her side of the family includes some

incredible family historians, providing easy access to such recipes. In fact, a few years back my Uncle Dave and Cousin Greg transcribed my great-grandmother’s recipes and self-published them as a gigantic recipe / history book.

I’ve spent a good chunk of the last few days here in Vancouver pouring over this book, marveling in the culinary changes that have taken place since my great-granny, Lydia Lush, was working away in the kitchen. I’ve laughed disgustingly at the pages of “jellied” recipes – Jellied Sandwiches, Jellied Salads, even Jellied Campbell’s soup (the only ingredients are Campbell’s soup and a package of lemon jelly powder … yikes!). I’ve poured over the chapter on “Domestic Science”, taking careful notes on how to preserve cheese, solder metal at home, remove grease spots, and properly dish up a plum pudding.

But of most interest to me are the hints of community and history found scattered across the pages. In an age where I google any recipe I want, Lydia carefully wrote each one out by hand, including notes about neighbours, social events,

My great grandmother - Lydia Lush

and new products —  Mrs Harley’s Filling for Maple Tarts (Much Liked!), Mrs Edmunds’ Marmalade, various cookie recipes from Mrs Mat, Miss Lyner, Aunt Annie, Mrs Murch and more; the emergence of products like Heinz Ketchup (1876)and Rice Krispies (1928); the inclusion of war-time & depression era recipes, that minimize the use of ingredients like milk and eggs. It really is an incredible read.

After much contemplation, this morning my mom and I decided to make pull-taffy. Alongside the notes in the book, my mom shared her own memories of making this with her own mother — and how handling the taffy helped her develop “Jarvis Fingers” (ones with so few nerves left in them that handling near-boiling taffy isn’t a problem. I do NOT have Jarvis fingers, though may have started developing them today!).

In any case, on a dreary Monday morning, this was the perfect project to work away on. For anyone looking for a sweet pick-me-up, I highly recommend trying the following…

Materials

  • 3 cups brown sugar
  • 1/2 cup white vinegar
  • 1/2 cup water
  • 3 tsp butter
  • 1/2 tsp baking soda
  • vanilla
  • big pot
  • wooden & metal spoons
  • waxed paper
  • a big tin or glass/ceramic dish
  • extra butter for greasing the above big tin or glass/ceramic dish

How to do it!

  1. Before you start anything, grease your final tin/pan really well. Give it lots of butter. This will make a big difference later.
  2. Put the sugar, vinegar and water in the pot and stir well.

    Before putting it on the boil

    Put this mixture on the stove on high heat and bring to a rolling boil.

    Minute 3 - it's almost on the boil!

    Once the mixture is on the stove, DO NOT stir anymore. Just watch it & make sure it doesn’t burn. Once it’s on the boil, you want to keep it rolling but may want to turn it down to medium heat.

    Boiling!

    Let it boil for about 10 minutes, and watch the transformation take place.

  3. Once it’s boiled for 10 minutes, add 3 tsp butter. Again, DO NOT stir, just let it do it’s thing.

    Boiling with the butter added.

    Let it keep boiling until it hairs. This may take a while. To test for “hairing”, dip a metal spoon in the mixture and lift out.

    Too drippy - not ready yet!

    If the taffy drips off the spoon, it’s not ready. But if it starts making hair-like strings, you’re set!

    Look at those hairs!

  4. Just before removing from the stove (or fire, as Lydia Lush writes), add your baking soda (which should be dissolved in a wee bit of hot water) and vanilla. This time, you can stir, but just a little.
  5. Pour the taffy into a buttered tin. You’ll see lots of evidence of the hairing here.
  6. This is the fun / painful part. The taffy will start to cool faster around the edges of your well-greased pan than in the middle, and ideally you want it to cool uniformly. So, you need to get the cooler taffy into the middle  by pulling it. Now, while this sounds straightforward, you’re basically having to put your fingers in ridiculously hot, sticky liquid. If you don’t have my mom’s Jarvis fingers, this is really painful. One way to help with this is to grease your hands up so the taffy won’t stick to your fingers as much. Please, please, please be careful with this part.

    Pulling the Taffy!

  7. Keep on lightly pulling the taffy to the centre until it is cool enough that you can hold a ball of taffy in your hands. You’ll likely want to re-grease your hands several times throughout.
  8. Now comes the real pulling. Work your taffy by pulling and twisting it over and over again, and feel the consistency change as the taffy cools and hardens. It will also change colour. Once your taffy is a golden straw-like colour, and fairly firm, you’re done.

    We didn't get many photos of this stage because you have to work fast and our fingers were covered in butter, but you get the idea.

  9. Lay out some waxed paper, and pull the taffy into long snake-like shapes, and twist it up.
  10. Let it sit until it’s hard like brittle candy, and then smash it up (using the back of a knife or just pure force!) into bite-size pieces.
  11. Enjoy – and don’t forget to brush your teeth after consuming!!!

I fully realize that last week I was bashing modern technology and talking about how out of place I sometimes feel. But today, I’m going to turn that statement right on its head.

Isn’t facebook sometimes just so incredible? I mean, sure, I can easily lose hours of my life to looking at photos of old friends who I haven’t seen since grade 3. (In fact, as I was typing this I thought of someone from grade 3, opened a new tab and spent 15 minutes looking at old photos of them. Yup, big time sink).

BUT! But, it can also be surprisingly wonderful. For example, 2 weeks ago I was scrolling through my newsfeed and there was a wee little note from the Wise Daughters Craft Market.

“This table loom available to the first person who emails me and promises to make a donation to Japan relief via charity of their choice.”

Of course, I emailed right away. From two different accounts.

Sadly, I wasn’t the lucky first respondent, but not long after, an email from Mary was in my inbox offering me a second table loom that she had kicking around. What luck!

This weekend, with a big, empty house to myself, I decided to learn how to weave. It went a little something like this…

Materials

  • A loom. If you don’t have a friend willing to give you one, you can check out this great video to learn how to make one from some slabs of wood or a big frame
  • Yarn of various colours
  • String or hemp
  • Scissors
  • A chopstick
  • A ruler (or in my case, some ruler-sized pieces of cardboard)
How to do it!
  1. To start, you need to string your loom. Starting on the bottom rung, tie your string/hemp in a double knot. Bring the yarn up away from you and over the top rung. Then bring it back towards you and under. This sounds confusing right? Basically, you want to make a series of figure eights. 
  2. I did 15 or so, then tightened up each strand, and tied it off on the bottom rung. This is your warp.
  3. A little note – you can also use yarn for your warp (as is shown in these early photos). Unfortunately, mine started to fray a lot, constantly breaking and making the weaving insanely difficult (see photo below). I then decided to switch to hemp, which worked super well. Experiment around and let me know what works for you!
  4. Another little note. You want to make sure your threads are pretty close together, and evenly spaced.
  5. Now, if you look down the side of your loom, you should see all the threads in their figure eight pattern. Insert your chopstick between the front threads and back threads, near the top of your loom and pull the chopstick down towards the bottom of the loom. This will increase the tension in each thread, and bring the X where the figure eights cross down towards the bottom of your loom. Leave your chopstick there. 
  6. The weaving itself is quite simple. Just like the woven placemats and the baskets, weaving is an in-out-in-out pattern. If you manually threaded your yarn in and out of each strand of the warp, it would take forever though. That’s where the loom comes in. Take your ruler and slide it between the front and back threads, just like you did with your chop stick. Then turn the ruler 90 degrees, so that it’s parallel with the table. This will open up a tunnel-like space between the front and back threads. Take a long piece of yarn and pull it through the tunnel, leaving a three inch tail at one end. 
  7. The next row is essentially the same technique, except you want to bring the back threads of the warp to the front and vice versa. Take your ruler and weave it through the warp, doing just this – bringing the threads at the back to the front, and forcing the front threads to go to the back.
  8. Just like last time, turn the ruler 90 degrees, opening up that tunnel and pass your piece of yarn back through the tunnel. Pull your yarn down to the bottom of your loom, so that it is right on top of the previous thread. Then turn the ruler back to being perpendicular with the table and use the rulers edge to push the stitches down close to each other.
  9. Keep repeating this pattern over and over again. You can change colours. You can create patterns. Pretty much anything is possible.
  10. The only issue with using a loom of this size is that (from what I can tell) you can only make items as large as your loom. This is why full sized looms take up whole rooms! My dreams of making a table runner aren’t going to quite come true with this, but a table runner for a doll house? A book mark? A doormat even? Those are all totally possible.
Thanks to Mary, Wise Daughters and, if course, Facebook for making this project a reality! 

Sometimes, I feel really out of place in the world.

While others are downloading apps for their iphones, jetting around the world for long-weekend vacations, and tweeting up a storm, I seem to be purposefully grounded in a different era. An era of writing letters by hand, of square-dancing on Saturday nights, of afternoon tea and quilting.

When I think of where these values and eccentricities come from, the first thing that jumps into my mind is my mom.

This is my Mom!

There are a bagillion things I could say about how amazing she is. How every Christmas, she writes close to 200 Christmas cards by hand, building community and staying lovingly in touch with people she hasn’t seen in 30 years. How she was at every flute performance I gave for 15 years, breathing in sync with me while sitting in the audience, sharing every pang of anxiety, every long-phrase, every after-performance thrill. How she’s always answered my ridiculous requests to learn to smock, knit, bake, sew, embroider, darn, quilt (the list goes on) with patience and love.

She is truly the most incredible woman that I know. And I am grateful that she raised me to value these trades & skills rather than forget them.

Last spring, about 4 months after I moved to Toronto, she came to visit. As we sat, sipping tea in my living room, she unzipped her suitcase and began pulling things out for me – photos of friends I hadn’t seen for some time that she’d printed off for me, a copy of a letter that I wrote when I was 8 that she found and thought I might get a kick out of. And then, an autoharp. An ice cream maker (that my sister eventually took). And finally … a yogurt maker!

All of the things she produced that day have brought me endless joy (I still laugh when I think about that letter, telling the

The first political letter I wrote!

government that I would busk on the street to make money to solve the budget problem). But the yogurt maker takes top prize for the most well-used. And brings me to today’s post…

How to Make Yogurt!

My Yogurt Maker!

A note before we get started. Yogurt makers are great – I love mine to bits. But they aren’t necessary. Yogurt makers keep the culture at a set temperature (slightly warmer than room temperature) in an air-tight container. This is handy, for sure, but you can also just monitor the temperature yourself and use another air-tight container.

Materials

  • 1 litre whole milk
  • Yogurt Starter (see below for details)
  • A pot
  • A candy thermometer
  • A yogurt maker, if you’re using one
How to do it!
  1. Pour 1 litre of milk into a pot and stick it on the stove. Bring it to ~85C (you want to do this over low-med heat so that it doesn’t burn or catch on the bottom) or to the boiling point.
  2. Let the milk cool to ~42-44C.
  3. When the milk has cooled, take about 1/2 cup and stir in your culture until it’s well mixed/dissolved.
  4. A note about culture! I used a 5g package of the culture shown here. This makes great yogurt. You can, however, also use the end of your last batch of yogurt (or yogurt you’ve bought from the store). About 2 Tbsp should be enough. 
  5. Add your 1/2 c. of milk with the culture back into the pot and stir well.
  6. Transfer into your containers. You want to create a little incubator for your yogurt(s) so that the bacteria can grow and flourish. If you’re using a yogurt maker, as mentioned above, it will do this for you. Each make is different, but you usually keep them plugged in for about 5-6 hours. If you’re not using a yogurt maker, you want to make sure your culture stays at about 38C. You can do this by placing your jars of yogurt (make sure they’re tightly closed) in a bath of warm water. Keep an eye on it to make sure it stays warm.
  7. After your yogurts have sat for 5-6 hours, stick ’em in the fridge overnight to cool and set.
  8. Voila! You have yogurt! Eat and enjoy!
Once you get this down pat, you can experiment with different flavours — the possibilities are endless!

a basket of fun!

I tend to not be much of a TV watcher, let alone a reality TV watcher. But in 2009, when I was living in the UK, I became obsessed with a reality TV show …  Victorian Farm. (Yup, I just gained about 100 nerd points).

Victorian Farm follows three Brits for a year while they attempt to live life Victorian style. From brick making to hay harvesting, lambing to life in the dairy, it really is a DIY/history nerd’s dream come true.

In one of my favourite episodes, Ruth learns about basketry. An incredible basket maker shows her not only how to make the most beautiful basket, but one that is so sturdy she can stand on it!

Ever since, I’ve been dreaming of making such a basket. And while I’m a long way off, today was a good first start, and appropriately done on a rainy Sunday, bringing waves of nostalgia for Britain…

Materials

  • #2 reed (1.75mm). You’ll need 16 spokes that are 26″ long, 2 spokes that are 13″ long, and a bunch of long weavers (keep reading for an explanation)
  • Scissors
  • Warm water and something to soak the reed in

After calling several craft stores in and around Toronto, I had the epiphany that I should google “basketry supplies Toronto” (d’uh!), and amazingly the first place that came up happened to be less than a block from where I work! For anyone looking for supplies in Toronto, I highly recommend Bamboo Bazaar at Davenport and Symington. Lovely service, great supplies, and for me at least, the perfect location!

How to do it!

I borrowed a basketry book from my favourite Toronto craft store (Wise Daughters) and made my first basket using instructions from there. The book is called Wicker Basketry by Flo Hoppe, and is full of not just great instructions but helpful pictures to follow as well. I’ve only done the one basket so far, but highly recommend it!

  1. When you’re making your baskets, you use reeds in two different ways. Your spokes run vertically on your basket and create the structure for your basket. These should be sturdy. Your weavers are the strands that run horizontally (the ones you weave!). These should be more malleable. Every piece of reed has its own quality. You’ll be able to tell which are sturdier and which are floppier by soaking them. Place just the ends of your strands in hot water and separate out the ones that go floppy like spaghetti from the ones that have more rigidity to them.
  2. Cut up your pieces. As mentioned above, you’ll need 16 x 26″ spokes and 2 x 13″ spokes (remember these are the more rigid ones!) and then a whole bunch of long weavers (the floppier ones).
  3. Soak the spokes so that they lie flat.
  4. We’re going to start with the base. Because this was my first basket, the book suggested an interwoven base. To begin, separate your 26″ reeds into groups of four and mark where the centre is. Overlap the sets of four to make a small square in the centre. Look at the picture to see how they should overlap (which sit in front and which are behind).
  5. A word about soaking. Soaking your reeds is really important to make them easier to work with. Finding the right balance of moisture for your weaving is tricky. I was told before I started to not soak too many reeds at once, or for too long, but had no idea what that meant. I wound up soaking the weavers one at a time, as I needed them, for about 5 minutes each. My recommendation? Play it by ear.
  6. Now it’s time to start weaving! Beginning at 12 o’clock, weave clockwise going under the first group of four, and over the next. Continue for four rounds. 
  7. Then alternate the pattern. To transition, keep your strand behind the top 2 groups of four and then continue on for four more rounds.
  8. Next, we’re going to weave in groups of 2 instead of four. Starting with your second group of four, start separating out the strands into groups of two. I fretted about making sure they were evenly spaced at the beginning (which I found hard), but it all just worked out in the end. So don’t fret!
  9. As you start to weave with groups of two, you’re going to stick another pair of spokes in (the two 13″ ones). This creates an odd number of spokes, which is important later. See the photo for how to add the spokes in.
  10. The pattern of “over, under, over, under” is called randing. Keep randing, trying to keep the weave as tight as possible. Because there are an odd number of spoke pairs, the weave will automatically alternate, creating this beautiful pattern.
  11. You may have already come to the end of one of your weavers. When you add another one, just over lap the two weavers a wee bit and keep going. Come back later and trim them back.
  12. For this basket, we’re aiming for a base of 4″, so once you get to that point, you want to start building up the sides of the basket. Basically, just start pushing the spokes into a vertical position. I found it helpful to weave with the spokes facing the floor. Keep on going until you have about 1″ of siding done.
  13. Next comes weave style #2 – slewing! Slewing is the same as randing, except that you’re doubling up the weave. Add a second weaver, and pretend that the two weavers are one. 
  14. Continue alone until you have 6 rows of slewing done. Then go back to randing (1 strand) for another inch or so. Look how much great work you’ve done!
  15. Last but not least comes the border. This one is called a “trac” border. Basically, you fold over one set of spokes and weave them through 3-4 spokes (over, under, over, under) allowing any excess length to flop into the inside of the basket (we’ll trim off the ends later). 
  16. Do this all the way around.
  17. Trim off any extra bits, and you’re done! Hurrah!

This was a simple, easy, cheap and totally satisfactory project. Like knitting and crocheting, it’s all about getting the pattern down, and once you have that, you can weave while listening to podcasts, watching your  favourite show, or chatting with a friend. I’ve been catching glances of my wee basket all day, and think I may be hooked.

It seems an odd time to be felting hats. Outside, I am convinced that spring has sprung. Sure, there may still be some snow on the ground, but since the clocks sprung forward and the glorious sun has decided to stay later in the day, it feels very spring-like indeed.

Our soon-to-be veggie garden!

These past two weekends have been gloriously un-scheduled for me – a rarity after the past 3 months, and a luxury that I have been bathing in. Each weekend morning has started with roommates congregating in the sun room, books and big mugs of tea in hand, to laze around in the morning sun. Last weekend, Ashleigh and I got a bit ahead of ourselves and even started our seedlings (probably not the best timing, but we were riding the wave of spring-excitement and nothing was going to stop us!). And this weekend, it’s been all about crafting.

After felting with the Barter Babe a few weeks ago, I started reading more about other felting methods, like needle felting (still to be tried) and felting by knitting an item and throwing it in the wash.

I’m a big fan of knitting, and have become a bit of an expert at beanie hats. This winter along I churned out 6 of them – they’re fast, easy, and everyone can use them. But truth be told, I was ready to spice things up a bit. Enter the idea of making a oversized beanie hat and felting it down.

Materials

  • 100% wool yarn
  • A pair of size 9 needles
  • A pair of size 6.5 needles
  • A large eyed hand sewing needle
  • Laundry Soap
  • A washing machine

How to do it!

  1. To start, you need to knit your hat.

    Big Hat!

    I had read that when you felt in a washing machine, things shrink about 30%, so I took my favourite hat pattern (see the end of the post for the pattern) and made it about 30% bigger. This was WAY too big.

  2. The hats I tend to make are on straight needles, so at the end you need to take your piece of yarn and use a hand sewing needle to stitch it together to become a hat. Kind of like this…
  3. The basics of felting are just like those described in my previous felting post. Hot water, soap and agitation basically causes the wool fibres to cling to each other for dear life and thus shrink in size. Last time, we did this by hand, but this time I tried using the machine.
  4. Put your machine on the smallest size setting, and the hottest water setting, add some soap and your hat and get started.
  5. In retrospect, I should have not allowed the washing machine to complete a full cycle, but instead should have kept it on the agitation cycle until the hat was the right size. But, this didn’t occur to me until later. So I just kept putting it into the wash over and over again and watched its progress. (I shudder to think of the amount of water I wasted in this process… yikes!). In any case, the progression was fairly amusing…

Before starting to felt. The hat was REALLY big.


After machine wash #1. Not much smaller.


After machine wash #2. Getting there. But I still look like a mushroom.


After machine wash #3. A fuzzy army helmet.


It totally almost fits!!! (This is after I caught on and kept the machine on the agitation cycle for the equivalent of three washes)


Woo! The Finished Product!

Other than the incredible amount of wasted water that occurred (which I feel completely and utterly guilty about), this was a totally hilarious project. In retrospect (again), I would have knit a hat somewhat smaller in size (maybe 15% bigger rather than 30%) although the density of the hat upon completion is fantastic!

The only real downside was the state of my washing machine after the process was over…

how cool does this look?

The Hat Pattern

For those who want to make a beanie hat, here’s the pattern. The initial numbers are for a regular sized hat, and the ones in brackets are for the one I made to felt (not necessarily recommended)

Cast on 54 (80) stitches on Size 9 needles.

R1: K2(4) P2(4) to end.

R2: P2(4), K2(4) to end.

Repeat until ribbing is 2″ (4″) long.

Then, switch to Size 6.5 needles. Follow the pattern of knitting a row, and purling a row until you have completed about 6″ (10″) from the bottom (ie included the ribbing).

Then you start to decrease. **K6 (10), k2 tog.** Repeat the pattern between the ** to the end of the row. Then purl a row. Next **K5 (9), k2 tog**. Repeat to the end of the row. Then purl a row. Continue in this way until you K2 tog for each stitch. You should be left with ~10 stitches on your needle.

Cut a long end off your yarn, and use your large-eyed hand sewing needle to pass the yarn through the remaining stitches and sew up the hat. Voila! You’re done!

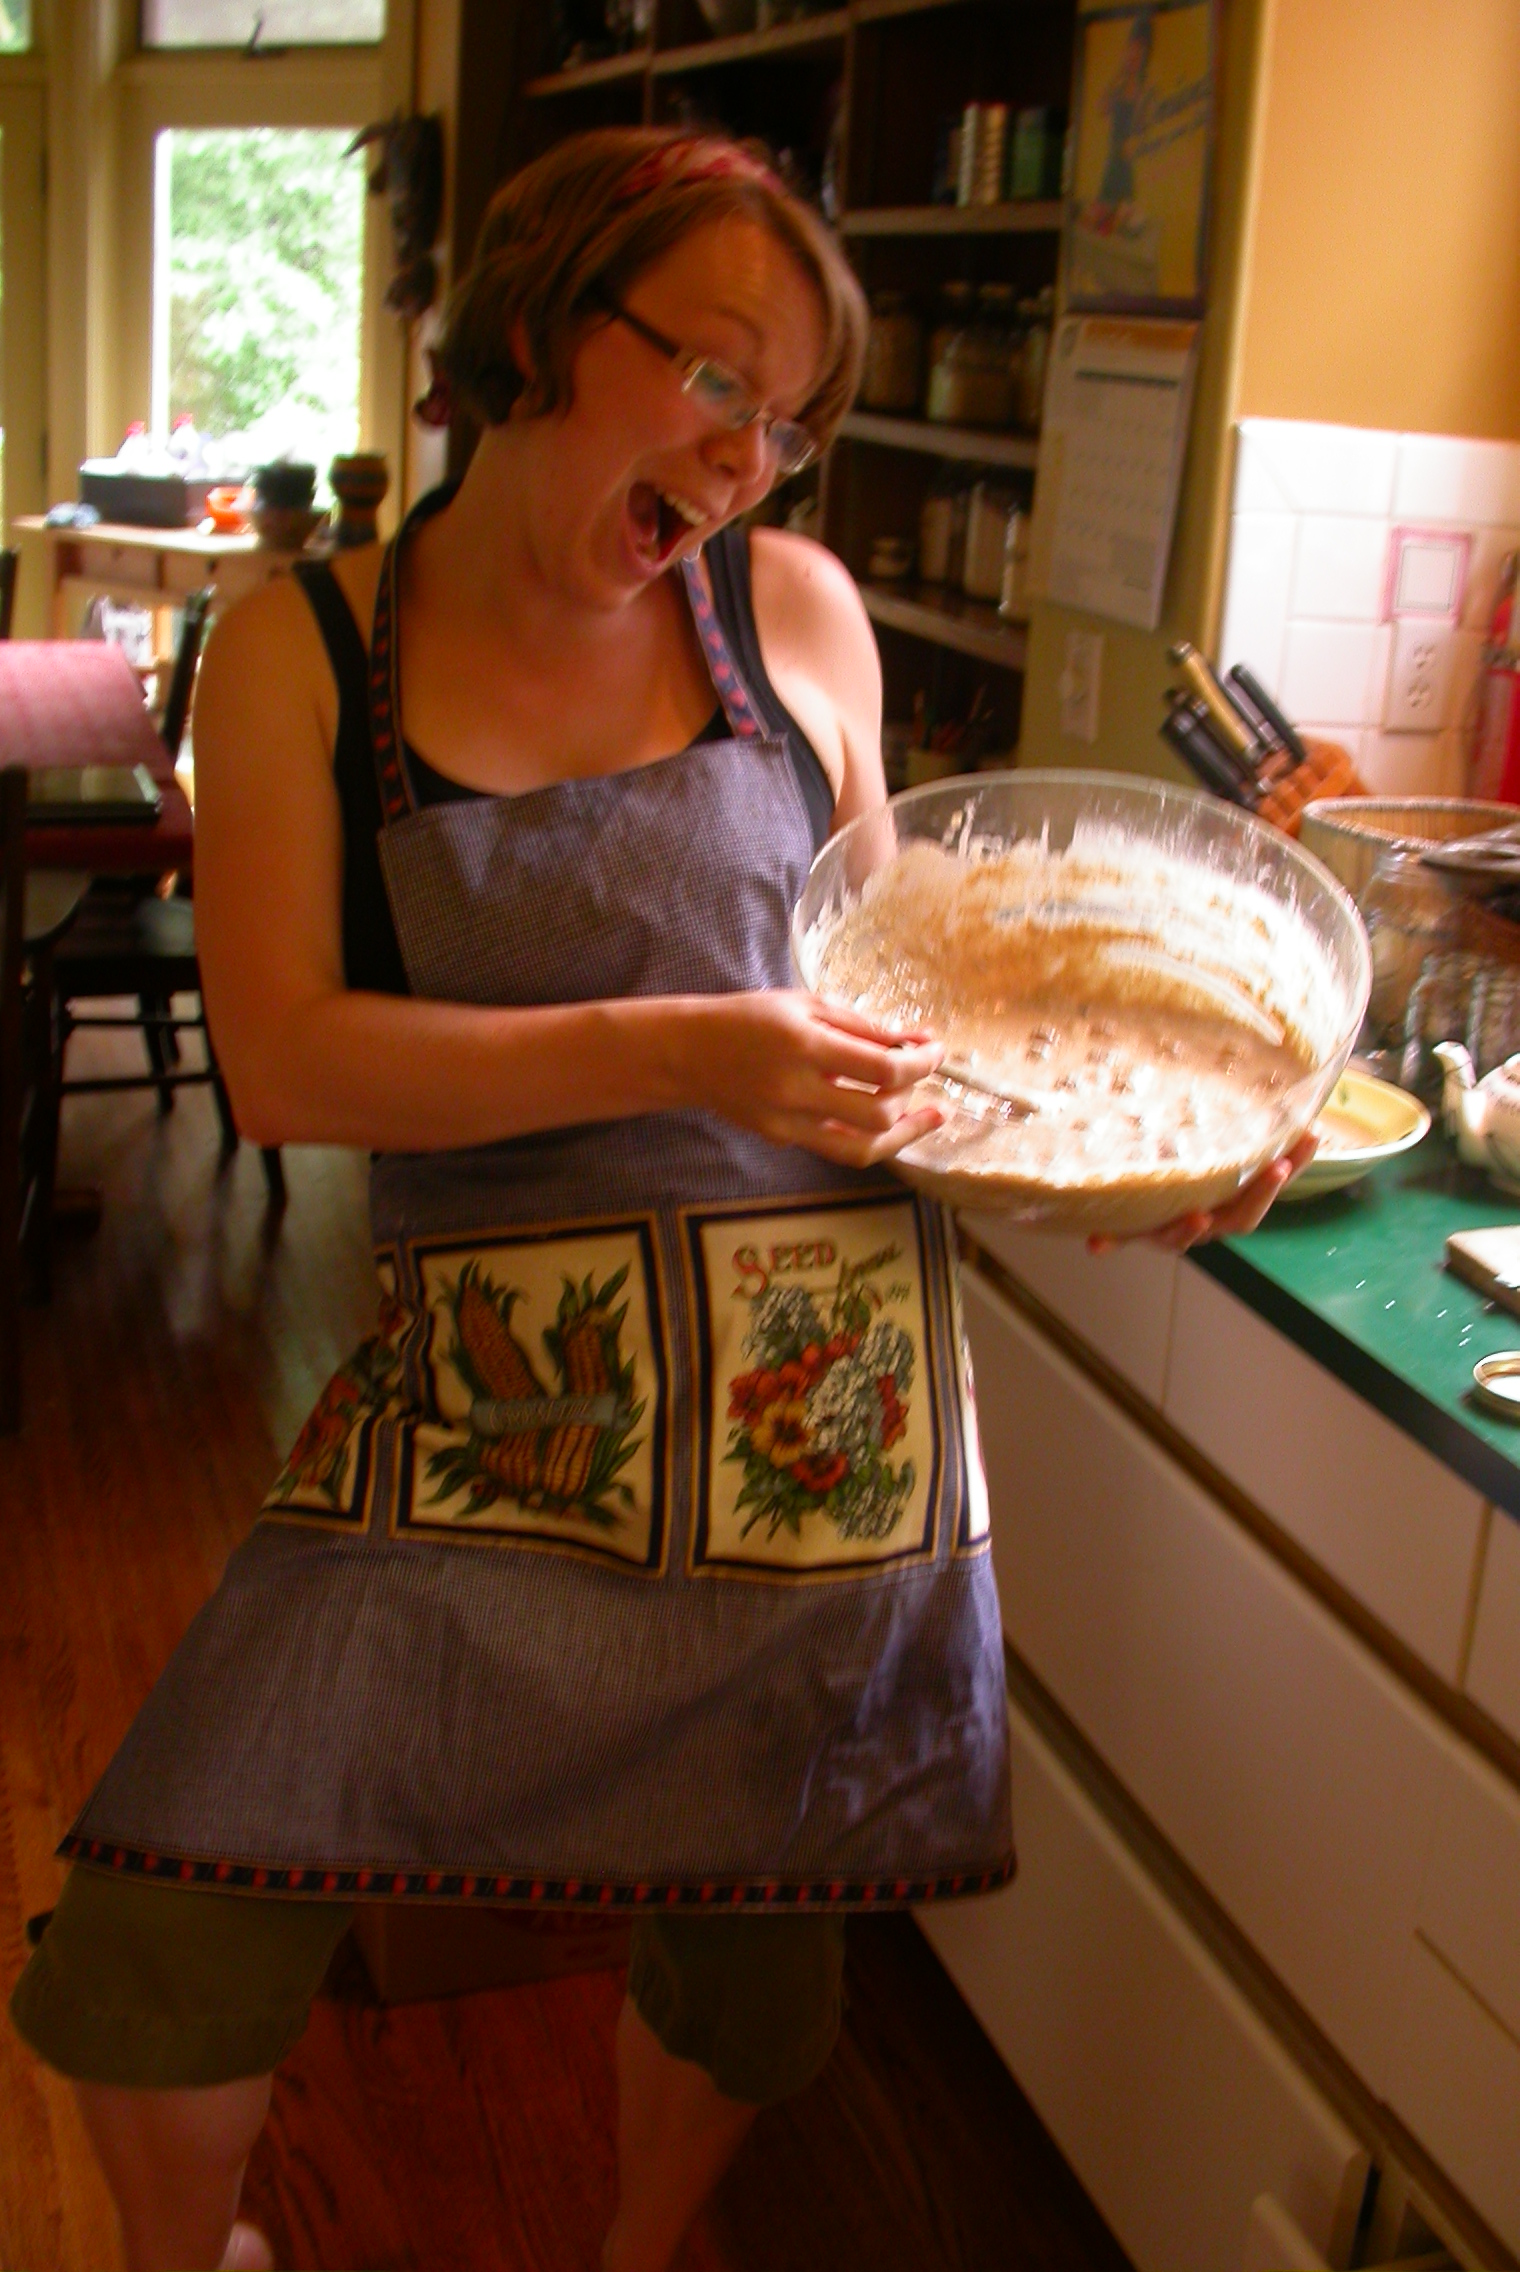
The Master Maple Maker, Jen V!

This week, 52 Projects features a guest blogger. You may recognize Jen V. from such posts as “A Mallow Day Off“. A former roommate and constant partner-in-silly-crimes, Jen has always been a source of DIY inspiration to me, especially in her life as a designer of recycled clothing. This week, Jen takes us through her experience as master-maple-maker, taking over her dad’s backyard maple syrup operation. Trust me, it’s worth sticking around for the ride.


Three years ago, my Dad and I decided to turn his yard into a maple syrup factory. He lives on a lot that is 75 metres by 75 metres with a bunch of maple trees and enough room for a fire pit (it wasn’t until year two that we discovered the importance of boiling the sap outside) which was the perfect combination for the establishment of a makeshift sugar shack.

In our first year we tapped one tree, boiling all of the sap over the stove in the house. The end product was runny, and we turned the house into a sauna. (Note: You have to boil off an average of 40 litres of water from the sap to get one litre of syrup!). But the excitement of creating this sweet tree nectar from our own backyard gave us enough incentive to increase production the next year.

Each year we’ve added a few more taps, and this year when my Dad announced that he was going down south for the second week of March – prime maple syrup time! – I declared myself  head apprentice of our production which now has 14 trees.

Materials

Drill (with a 7/16” drill bit – auger works best)

Hammer

Tap, bucket & lid*

Big bucket or container (holds 5L or more)*

Pan & lid (the bigger the surface area the better)*

Screen (the kind that you put over a frying pan when you’re frying bacon)

Fire pit with a rack

Kindling and firewood

Candy Thermometer*

Stovetop pot

Filter

Jars or bottles & lids*

Funnel

*If you don’t already have these and can’t find them at your local hardware store, try a rural hardware store. If it’s in an area with a lot of maple trees, odds are they will sell all of the maple syrup making supplies that  you could ever need.

How to do it!

When to tap

Maple trees pump their sap from their roots up to their branches as the weather starts to warm up at the end of the winter. In Ontario, this usually starts in early March, and when the sap is flowing, it’s time to start tapping. I don’t have a surefire trick to know when it’s time to tap, so I keep me eye on the temperature and use that as a guide. When the temperature starts creeping above  freezing in the day time but stays below over night, I’ll tap a tree to test. If it runs, all of the taps go in and stay in until the sap stops running which can be anywhere from a week to three weeks later.

Tap the trees

Find a sugar maple tree. You can use other types of maples, but these have the highest concentration of sugar in their sap. Make sure the tree is at least 18” in diameter. Pick a spot that is chest height and drill a 4-inch deep hole into the tree, pointing slightly upward so gravity will draw the sap down.

Insert the tap, and use a hammer to tap it in to the tree until it is snug. Hang the bucket, affix the lid and you’re ready to go.

Boil the sap

Use the big bucket or container to collect the sap from your trees. The sap will keep for about a week if it’s refrigerated, forever if it’s frozen, and only a few days if it is left out. Set up your pan over the fire (an outdoor stove or bbq will also do the trick), fill it halfway with sap, pouring it through the screen to filter out debris.

Place the lid on top, leaving it slightly ajar so that the steam has a place to escape. If your pan doesn’t come with a lid, a slab of plywood will work. Check on the sap level every 30 to 45 minutes, and continue adding sap to the pan. As the sap gets darker (after 12-14 hours of boiling), start keeping your eye on the temperature. When it reaches 102-103 C, take the sap off the fire and pour it into a stovetop pan. The rest of the boiling will happen inside over a stove so that you have control over the temperature.

Filter the sap

Before boiling it down to syrup, pour the sap through some kind of filter. You can buy a special re-useable maple syrup filter (we prop ours up with a metal tomato cage), or use coffee filters.

Turn it into syrup

With the sap in a stovetop pot, put it on your stove on high heat. Turn your overhead fan on so that the fan (as opposed to the walls of your house) absorbs the excess moisture. Once the sap comes to a boil, lower the element to medium heat, and keep the sap at a rolling boil. Using the thermometer, bring the sap up to 106C – this will leave you with a nice thick syrup.

For your first batch, let the syrup cool to room temperature. If the end product is too runny, you’ll need to bring it to a higher temperature. Experiment with one degree differences until you find the perfect temperature to get the consistency of syrup that you like.

Preserve it

Because syrup has such a high sugar content (which acts as a natural preservative), I don’t worry too much about canning it perfectly. Having said that, I lean more towards glass jars and bottles because you can sterilize them easily in the oven.

If your syrup storing containers are glass, sterilize them by putting them in the oven at 200F for 10 minutes. Make sure the syrup is hot. Using the funnel, fill each jar with syrup. If your containers are plastic, make sure they are washed out, that the syrup is cool, and then fill them up using the funnel. If you are using actual maple syrup bottles, you can buy brand new lids each year that will seal when you first put them on. Mason jars are another easy option, and snap lids can be found in almost any hardware or grocery store.

Thanks Jen! For those in the Toronto area, check out this amazing organization Not Far From The Tree that taps maple trees in the city!