I fully realize that last week I was bashing modern technology and talking about how out of place I sometimes feel. But today, I’m going to turn that statement right on its head.
Isn’t facebook sometimes just so incredible? I mean, sure, I can easily lose hours of my life to looking at photos of old friends who I haven’t seen since grade 3. (In fact, as I was typing this I thought of someone from grade 3, opened a new tab and spent 15 minutes looking at old photos of them. Yup, big time sink).
BUT! But, it can also be surprisingly wonderful. For example, 2 weeks ago I was scrolling through my newsfeed and there was a wee little note from the Wise Daughters Craft Market.
“This table loom available to the first person who emails me and promises to make a donation to Japan relief via charity of their choice.”
Of course, I emailed right away. From two different accounts.
Sadly, I wasn’t the lucky first respondent, but not long after, an email from Mary was in my inbox offering me a second table loom that she had kicking around. What luck!
This weekend, with a big, empty house to myself, I decided to learn how to weave. It went a little something like this…
Materials
- A loom. If you don’t have a friend willing to give you one, you can check out this great video to learn how to make one from some slabs of wood or a big frame
- Yarn of various colours
- String or hemp
- Scissors
- A chopstick
- A ruler (or in my case, some ruler-sized pieces of cardboard)
- To start, you need to string your loom. Starting on the bottom rung, tie your string/hemp in a double knot. Bring the yarn up away from you and over the top rung. Then bring it back towards you and under. This sounds confusing right? Basically, you want to make a series of figure eights.
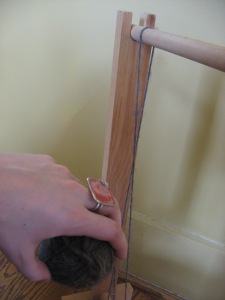
- I did 15 or so, then tightened up each strand, and tied it off on the bottom rung. This is your warp.
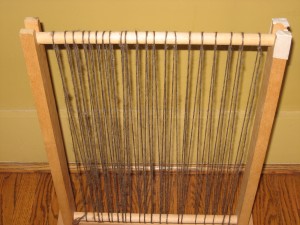
- A little note – you can also use yarn for your warp (as is shown in these early photos). Unfortunately, mine started to fray a lot, constantly breaking and making the weaving insanely difficult (see photo below). I then decided to switch to hemp, which worked super well. Experiment around and let me know what works for you!

- Another little note. You want to make sure your threads are pretty close together, and evenly spaced.
- Now, if you look down the side of your loom, you should see all the threads in their figure eight pattern. Insert your chopstick between the front threads and back threads, near the top of your loom and pull the chopstick down towards the bottom of the loom. This will increase the tension in each thread, and bring the X where the figure eights cross down towards the bottom of your loom. Leave your chopstick there.

- The weaving itself is quite simple. Just like the woven placemats and the baskets, weaving is an in-out-in-out pattern. If you manually threaded your yarn in and out of each strand of the warp, it would take forever though. That’s where the loom comes in. Take your ruler and slide it between the front and back threads, just like you did with your chop stick. Then turn the ruler 90 degrees, so that it’s parallel with the table. This will open up a tunnel-like space between the front and back threads. Take a long piece of yarn and pull it through the tunnel, leaving a three inch tail at one end.
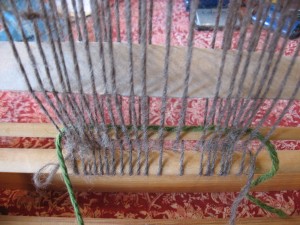
- The next row is essentially the same technique, except you want to bring the back threads of the warp to the front and vice versa. Take your ruler and weave it through the warp, doing just this – bringing the threads at the back to the front, and forcing the front threads to go to the back.

- Just like last time, turn the ruler 90 degrees, opening up that tunnel and pass your piece of yarn back through the tunnel. Pull your yarn down to the bottom of your loom, so that it is right on top of the previous thread. Then turn the ruler back to being perpendicular with the table and use the rulers edge to push the stitches down close to each other.

- Keep repeating this pattern over and over again. You can change colours. You can create patterns. Pretty much anything is possible.
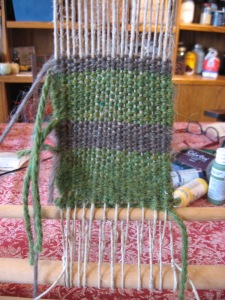
- The only issue with using a loom of this size is that (from what I can tell) you can only make items as large as your loom. This is why full sized looms take up whole rooms! My dreams of making a table runner aren’t going to quite come true with this, but a table runner for a doll house? A book mark? A doormat even? Those are all totally possible.
